このガイドはVirtualBoxでマイクロソフトのIEテストVMイメージを動きことを説明する。
Step 1. Download MS Images | MSイメージをダウンロード
MS Images
Step 2. Download Intel 1000 Desktop Drivers | Intel 1000 デスクトップドライバーをダウンロード
Intel Driver
Step 3. Create new WinXP VM | 新しいWinXPVMを作成
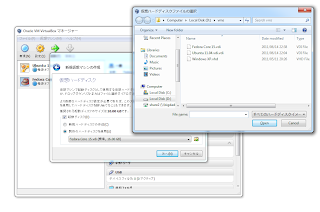
Be sure when creating the image to chose the .vhd file that you extracted from the MS "installer".
マイクロソフトのイメージインストラーからの「.vhd」ファイルを選択する。
Step 4. Change Network Card | ネットワークカードを変更
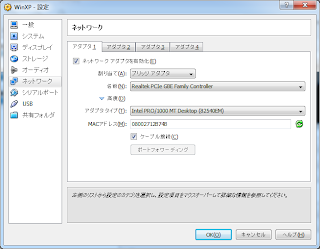
Under 'Settings' -> Network -> "Adapter 1" tab chose your network type (bridged/NAT whatever). Then under Advanced chose "Intel PRO/1000 MT Desktop (82540EM)" for the driver.
設定 → ネットワーク → アダプタ1のタブのネットワーク割り当てから好きな設定を選択する。高度設定のアダプタタイプから「Intel PRO/1000 MT Desktop (82540EM)」を選び。
Step 5. Create ISO from Intel Driver | インテルドライバーのISOを作る
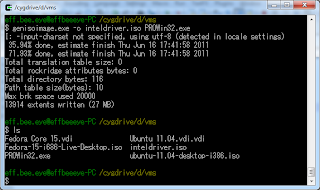
You should have the PROWin32.exe driver downloaded. Start up cygwin for windows (or your terminal in *nix. Go to the directory that has the driver installer and run the following command:
genisoimage -o inteldriver.iso PROWin32.exe
もう既にPROWin32.exeドライバをダウンロードした。WindowsでのcygwinかUnixでのシェールを起動し、PROWin32.exeの入っているディレクトリから以下のようなコマンドを実行する:
genisoimage -o inteldriver.iso PROWin32.exe
Step 6. Start VM | VMを起動
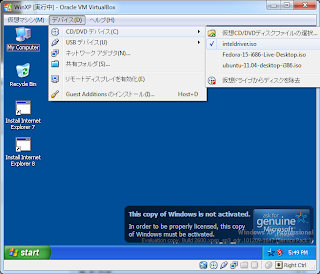
Step 7. Mount the Intel Driver ISO | インテルドライバのISOをマウント
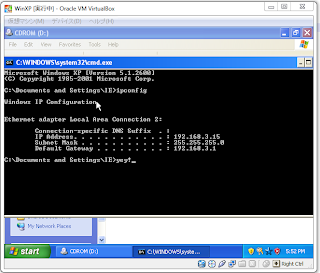
Step 8. Install Driver | ゲストでドライバをインストールする
Step 9. Profit! | 利益!
Don't forget to activate!
Activateを忘れないで!
No comments:
Post a Comment